Using Redviewer to convert a zar into a
Tile for Fallout Tactics.
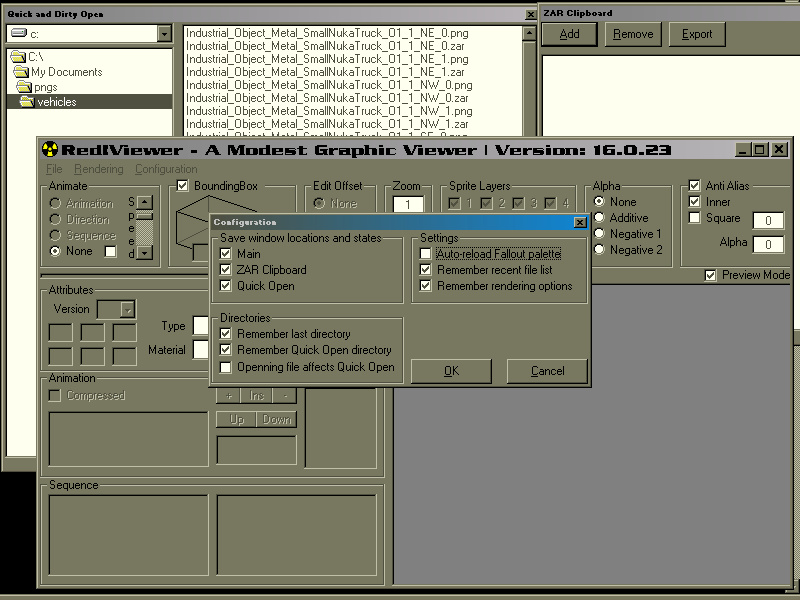
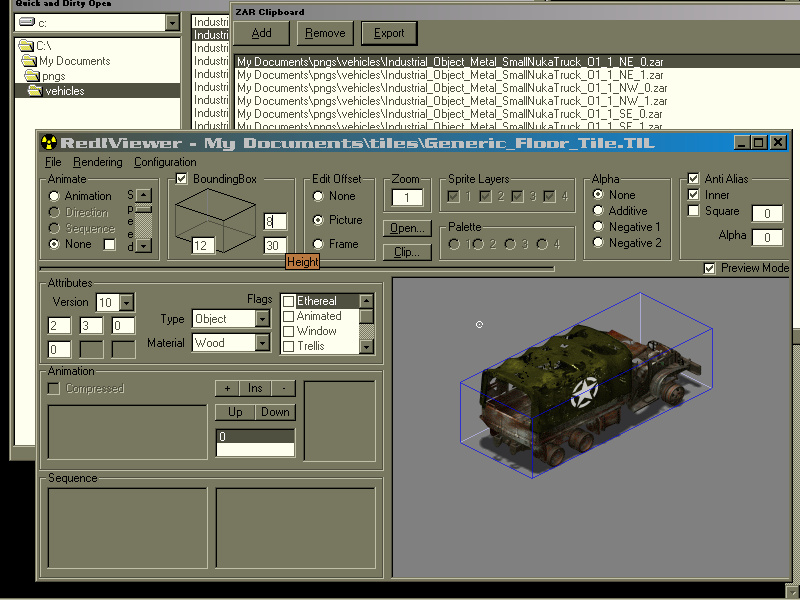
1. First set up
Redviewer’s configuration, I find it essential to save the window locations and
states and it is very useful to have it remember your last directory etc. and
also to tick the Bounding box option in the main window.
2. Next find
the zars you have created using FT Tools in the quick and dirty open window. If
you are just making a single tile you can use the open command but when you
have a lot of tiles to make the quick window is essential.
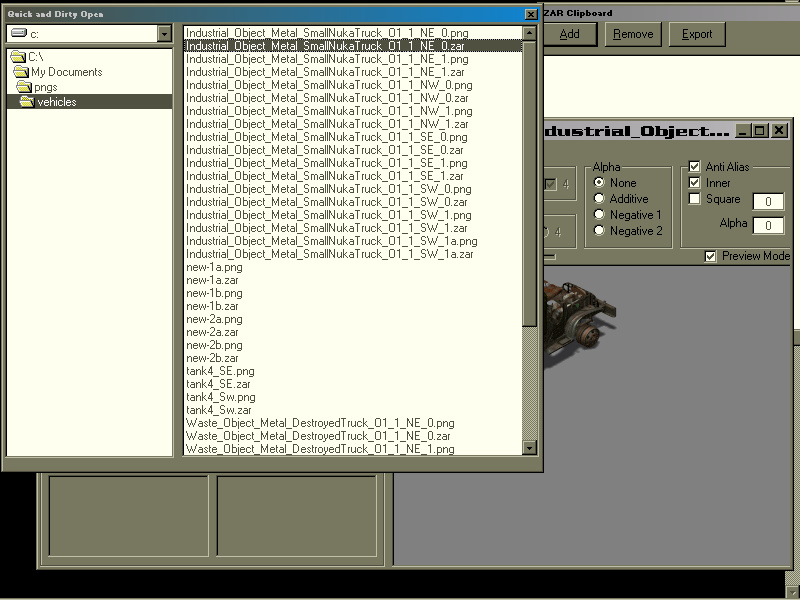
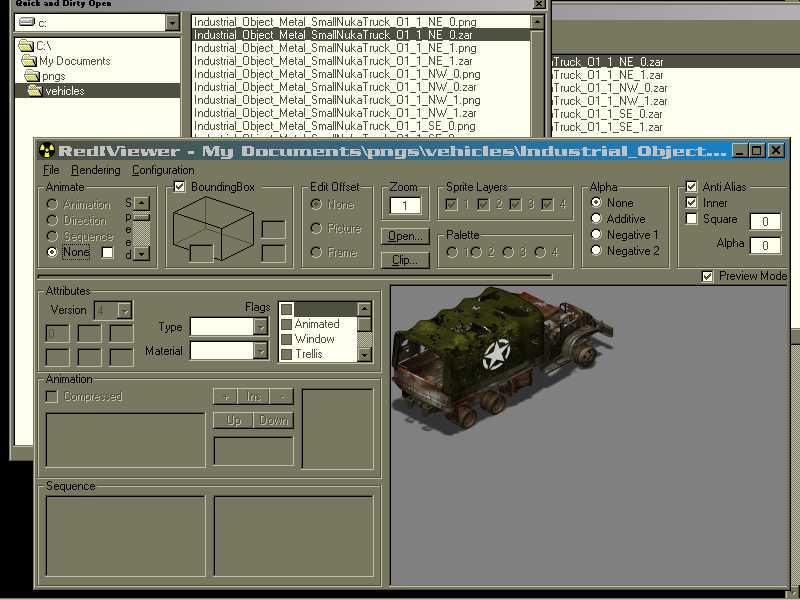
Just click on
the file name and it will appear in the main window of Redviewer.
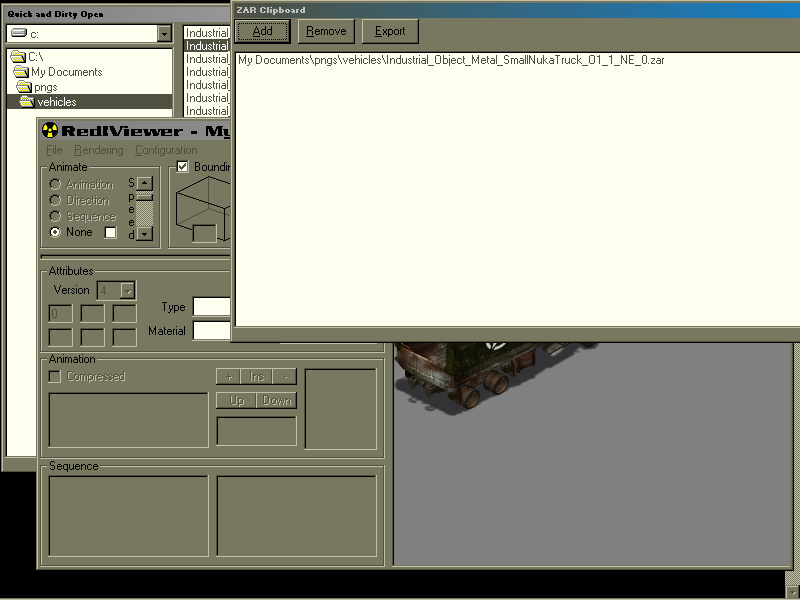
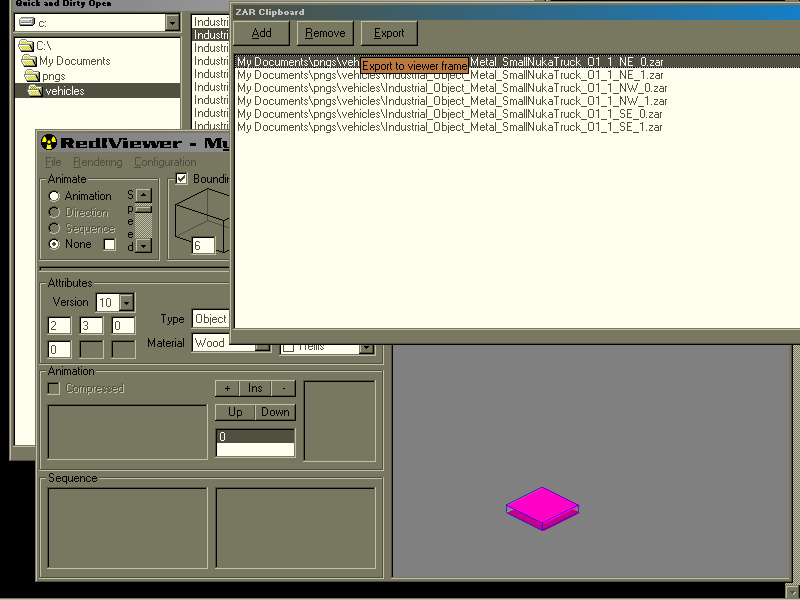
3. Now you need
to open the zar clipboard and add each zar to it. If you are just making a
single tile you can now go to step 4, but if you have a batch of tiles to make
add all your zars to the clipboard first.
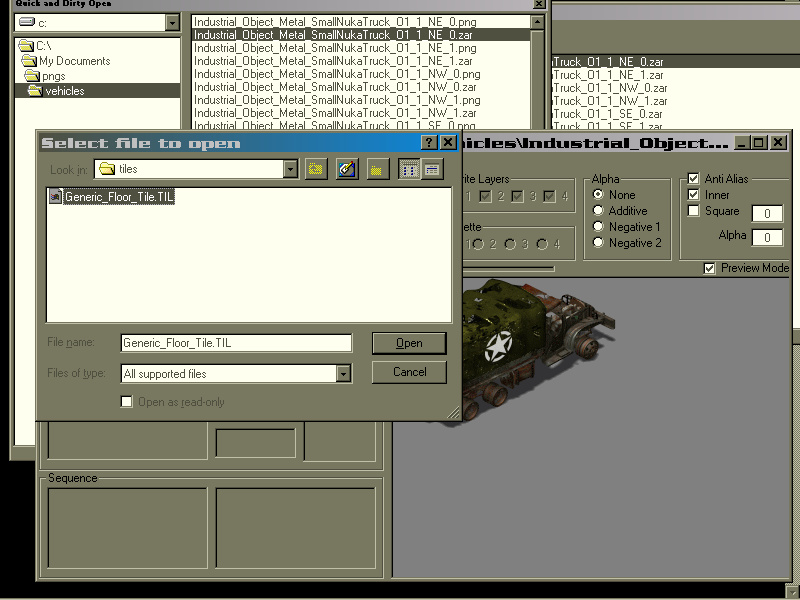
4. In version
16.0.23 you can’t create a new tile from scratch so you need to open an
existing tile. To prevent overwriting a tile by mistake I created a new
tiles folder under My Documents and copied the invisible (pink) tile there to
use as a template. I can now just open this whenever I want to make a new tile.
5. Once you
have a tile open you need to export your zar from the clipboard into your tile.
Select the zar and click on export.
6. When you
import your image from the clipboard you’ll notice it doesn’t line up with the
bounding box.
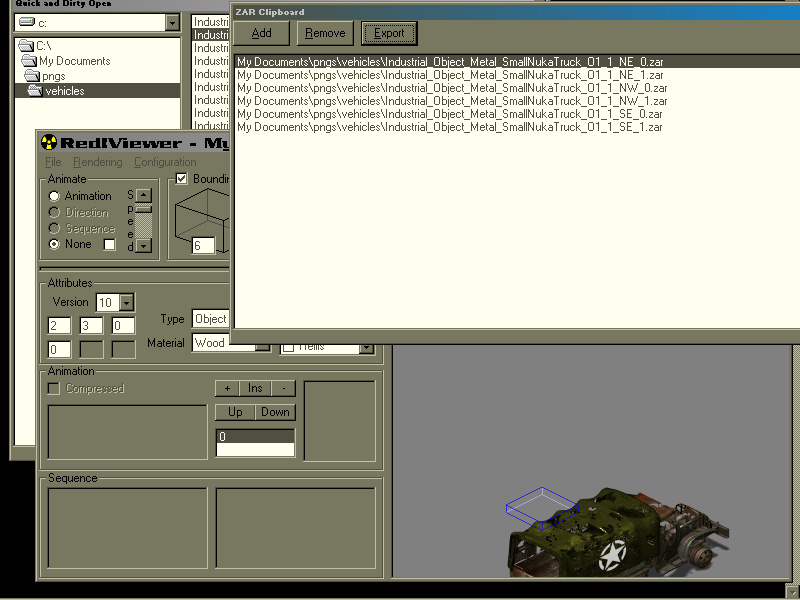
In edit offset
click on picture and use the WASD keys to move your image until it lines up
with the bottom left corner of the bounding box.

In the
example above I’ve converted an existing tile into a new image, when doing so
if I open up the original tile and export the new image from the clipboard it
will fit in the bounding box exactly and then I can just save it as a new tile.
7. Now in the bounding
box section adjust the numbers until the box encompasses the image.
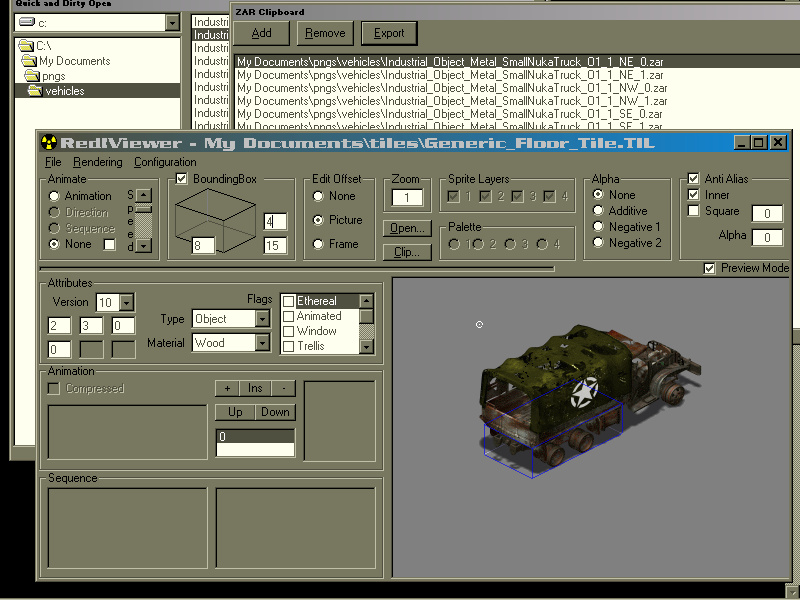
It’s just a
matter of trial and error to get the right dimensions. If once you have the
correct dimensions you’re not happy with the positioning, you can use the WASD
keys again to adjust the offset. You will need to click on none first in edit
offset and then picture before you can make the adjustments.
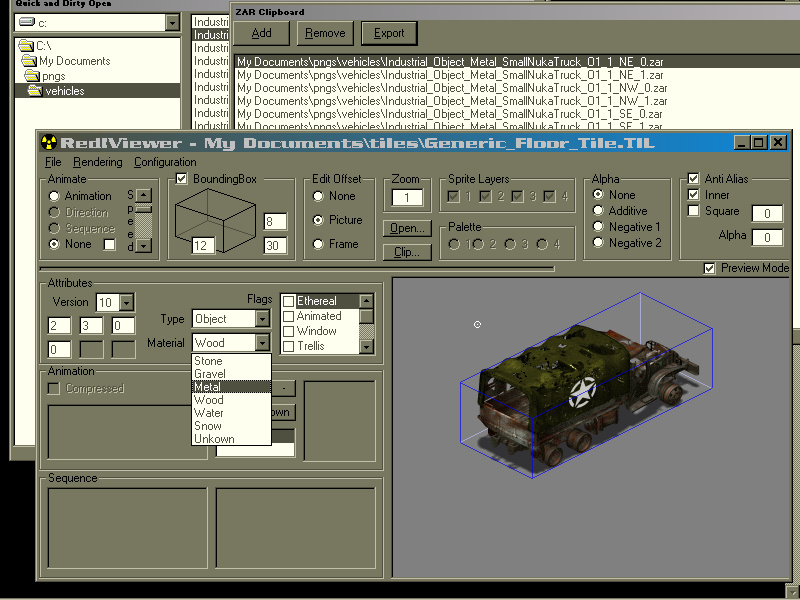
8. Once you are
happy with the bounding box you need to set the tile attributes, the type of
material is in a pull down list. Remember to choose the right attributes for if
the image is a wall, floor or object tile and any flags if it’s a window etc. See
Appendix
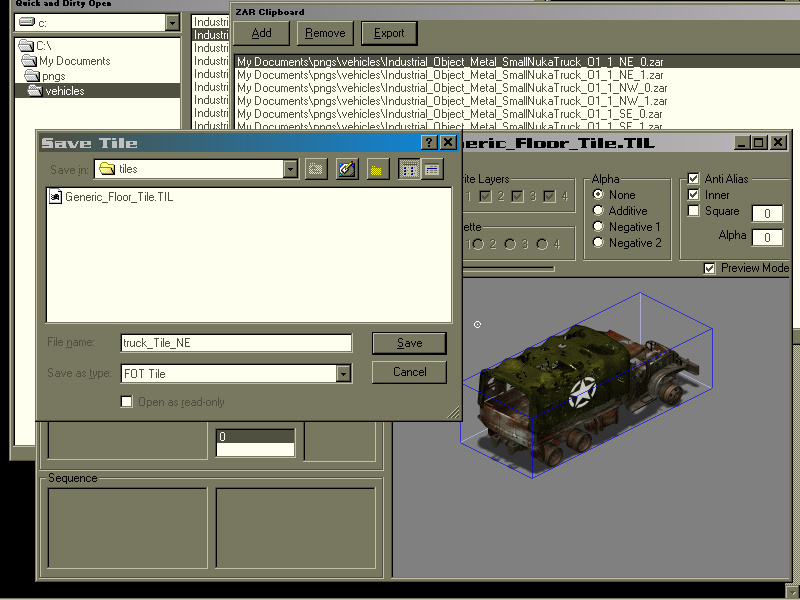
9. Now just
save the tile, if you are making several versions of the tile facing different
directions then in the file name the compass direction must be in capitals for
it to show up when you filter the tiles by direction in FT Tools.
Once the file
is saved create a directory under core/tiles for you to place your work in the
editor. All my tiles are go in core/tiles/requiem and then I’ve subdivided
the directory by type.
Appendix.
Tile Flags
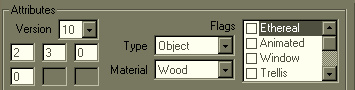
In the
attributes section of the main window there are several tick boxes for the tile
flags.
The flags tell
FT Tools that this tile does something special.
The flags are
as follows
Ethereal: as
this suggests with this flag the tile is not solid and can be walked pass
through by actors and projectiles. It doesn’t make the tile transparent though.
Decorative floor tiles such as blood pools are ethereal so that the player
doesn’t have to climb over them; likewise small plants such as grass shoots are
ethereal so that they don’t cause obstructions. There’s nothing worse than
crashing your tank by hitting a blade of grass.
Animated: for
animated tiles such as the bubbling goop floor tiles.
Window: allows
the actors to see through a wall tile that has a window opening, even if the
image is transparent the actors can’t see through the bounding box unless the
tile is flagged window. Effectively it halves the bounding box allowing actors
to hide by crouching or going prone behind the tile or to see and shoot through
the tile.
Trellis: I
believe this is actually misnamed and should be named Cover. Used in
conjunction with the trellis flag this will give an actor some cover behind a
tile that is transparent or partially transparent. To flag a trellis tile you
will actually need to edit the attributes boxes on the left.
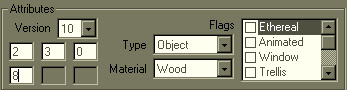
The bottom box
should have a value of 8 to add the trellis flag to a tile. The trellis flag
allows an actor to see and shoot through a tile like the window flag, but
unlike flagging a tile window, actors hiding behind a trellis tile will still
be visible when they crouch or go prone. The best example of its use is
SenorDeluxe’s chain link fence tiles.
Climbable:
another obvious one, this should be used for climbing tiles such as ladders or
rope, not stairs or slopes.
No Alpha: again
I believe this is misnamed and should be named No Shadow. If a tile is flagged
with this it will not show a shadow (turn black) when another tile is placed
partially over it or if it is placed outside the camera boundaries. This flag
should mainly be set in FT Tools, not Redviewer, and will not be stripped if
you update tiles.
No Shadow: I
believe should actually be No Popping, this will stop a tile from popping when
an actor passes underneath. Again this flag should be chosen in FT Tools not
Redviewer.
Invisible: Once
update tiles is run this flag will turn tiles invisible, mainly used to pop a
roof of a building slightly earlier.